Sandbox Management

Sandbox Clone
| Question | Answer |
|---|---|
| How Sandbox Clone is different from regular Sandbox | With Sandbox Clone, you can create a copy of an existing sandbox. That copy will contain all data that existed in the Source Sandbox at the time of the copy. A regular sandbox is a copy of production org. In Setup > Sandboxes page it will be have Copied From field |
| How to create or refresh cloned sandbox | You can create or refresh a cloned sandbox the same way you use a regular sandbox, you have to choose your source sandbox rather than production on the Create From drop-down field.You can clone a sandbox that’s on a different major Salesforce release version than your production organization. |
| Things to know | A sandbox clone can only be of the same type sandbox as the source. For example, a 'Full Copy Sandbox' can only be cloned as another 'Full Copy Sandbox.' |
Sandbox Refresh
1. Create a Pre-refresh Checklist
2. Minimize Downtime using right refresh window (taking care of developers developing new features, UAT and Training users)
-
Makes sure that refresh window aligns with Salesforce release window
-
For each sandbox
-
Salesforce sandbox refreshes take time - It is a function of amount of configuration and metadata it contains
-
Determine a window for running sandbox refresh - this could take around 2 days
-
During this window the sandbox won’t be available
-
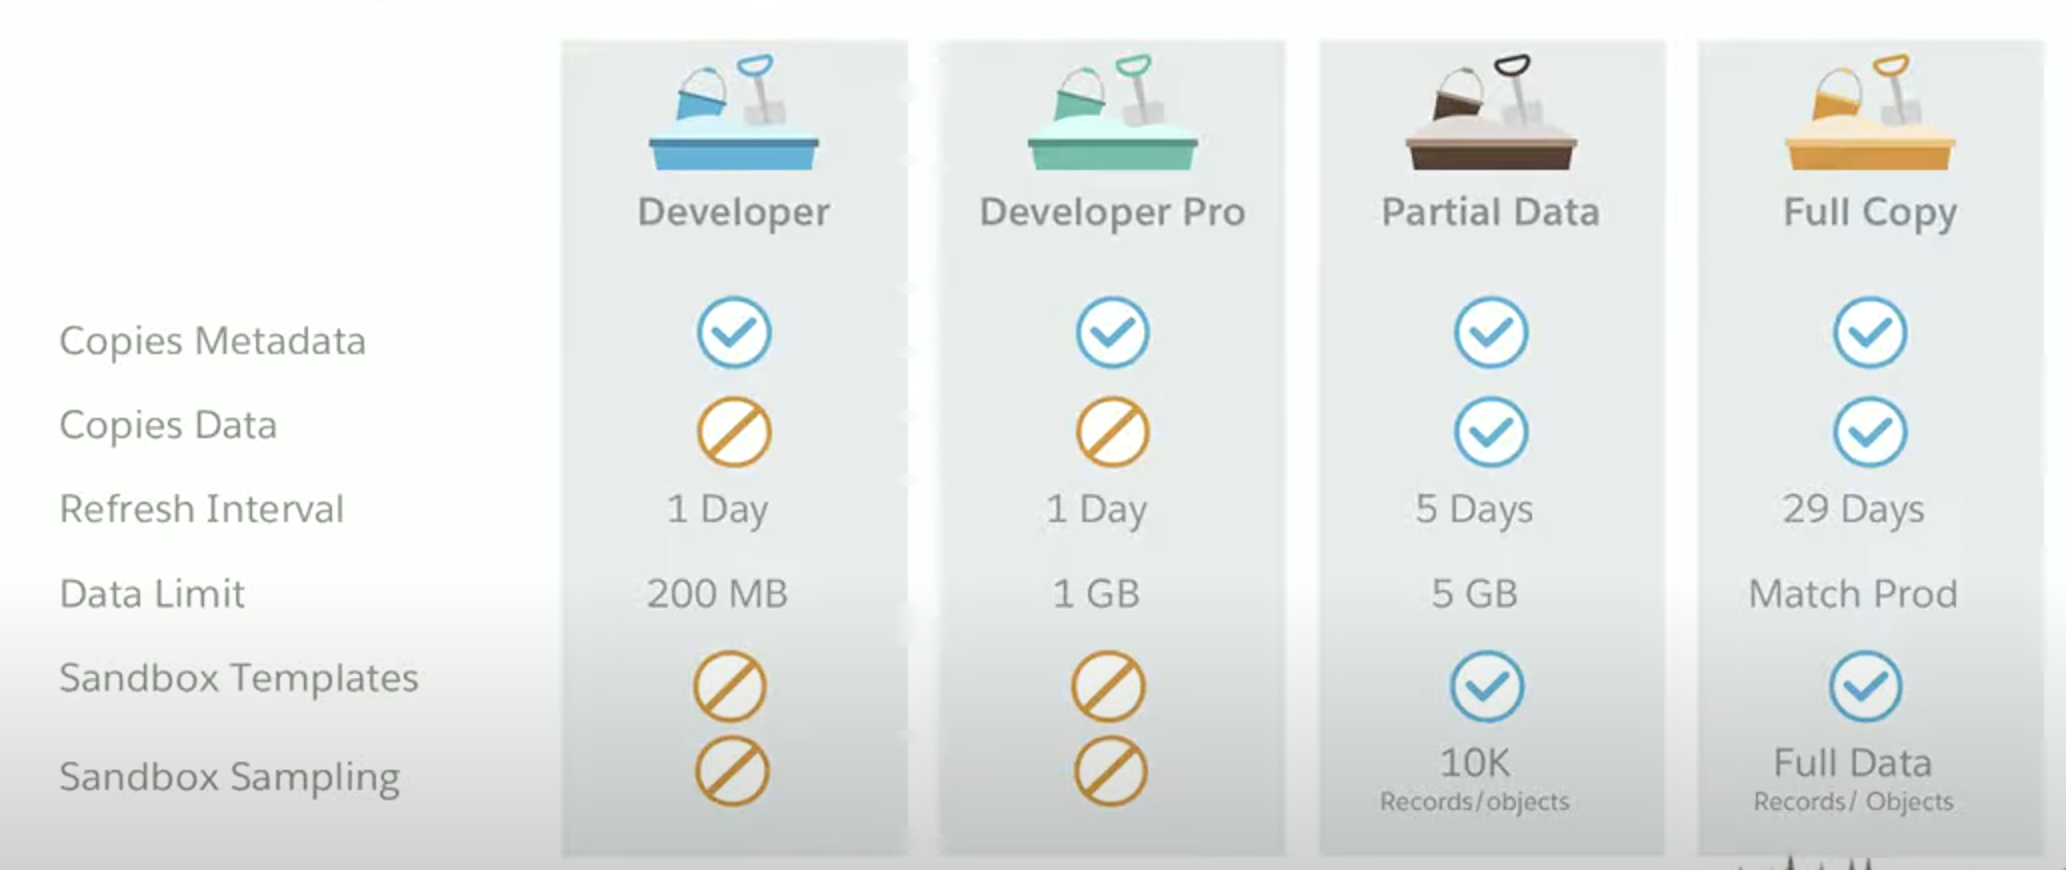
Type of sandbox determines how often it can be refreshed:
- Developer, Developer Pro - 1 day
- Partial Copy - 5 days
- Full Copy - 29 days
-
Refreshing the sandbox will delete all that metadata (that is not yet committed in to Production)
-
3. Sandbox Refresh Communication
- Communicate early and often about the Sandbox Refresh
- Use custom metadata types (mdt) in production, so they’re easily modified
- Use custom settings and/or custom metadata types to specify email addresses, integration endpoints, etc.
- modify these values post-refresh
- Have 2 records per metadata type—one for production and one for sandboxes
- Apex classes can then use the
IsSandboxproperty to dynamically choose which metadata type to use at runtime.
SELECT IsSandbox FROM Organization LIMIT 1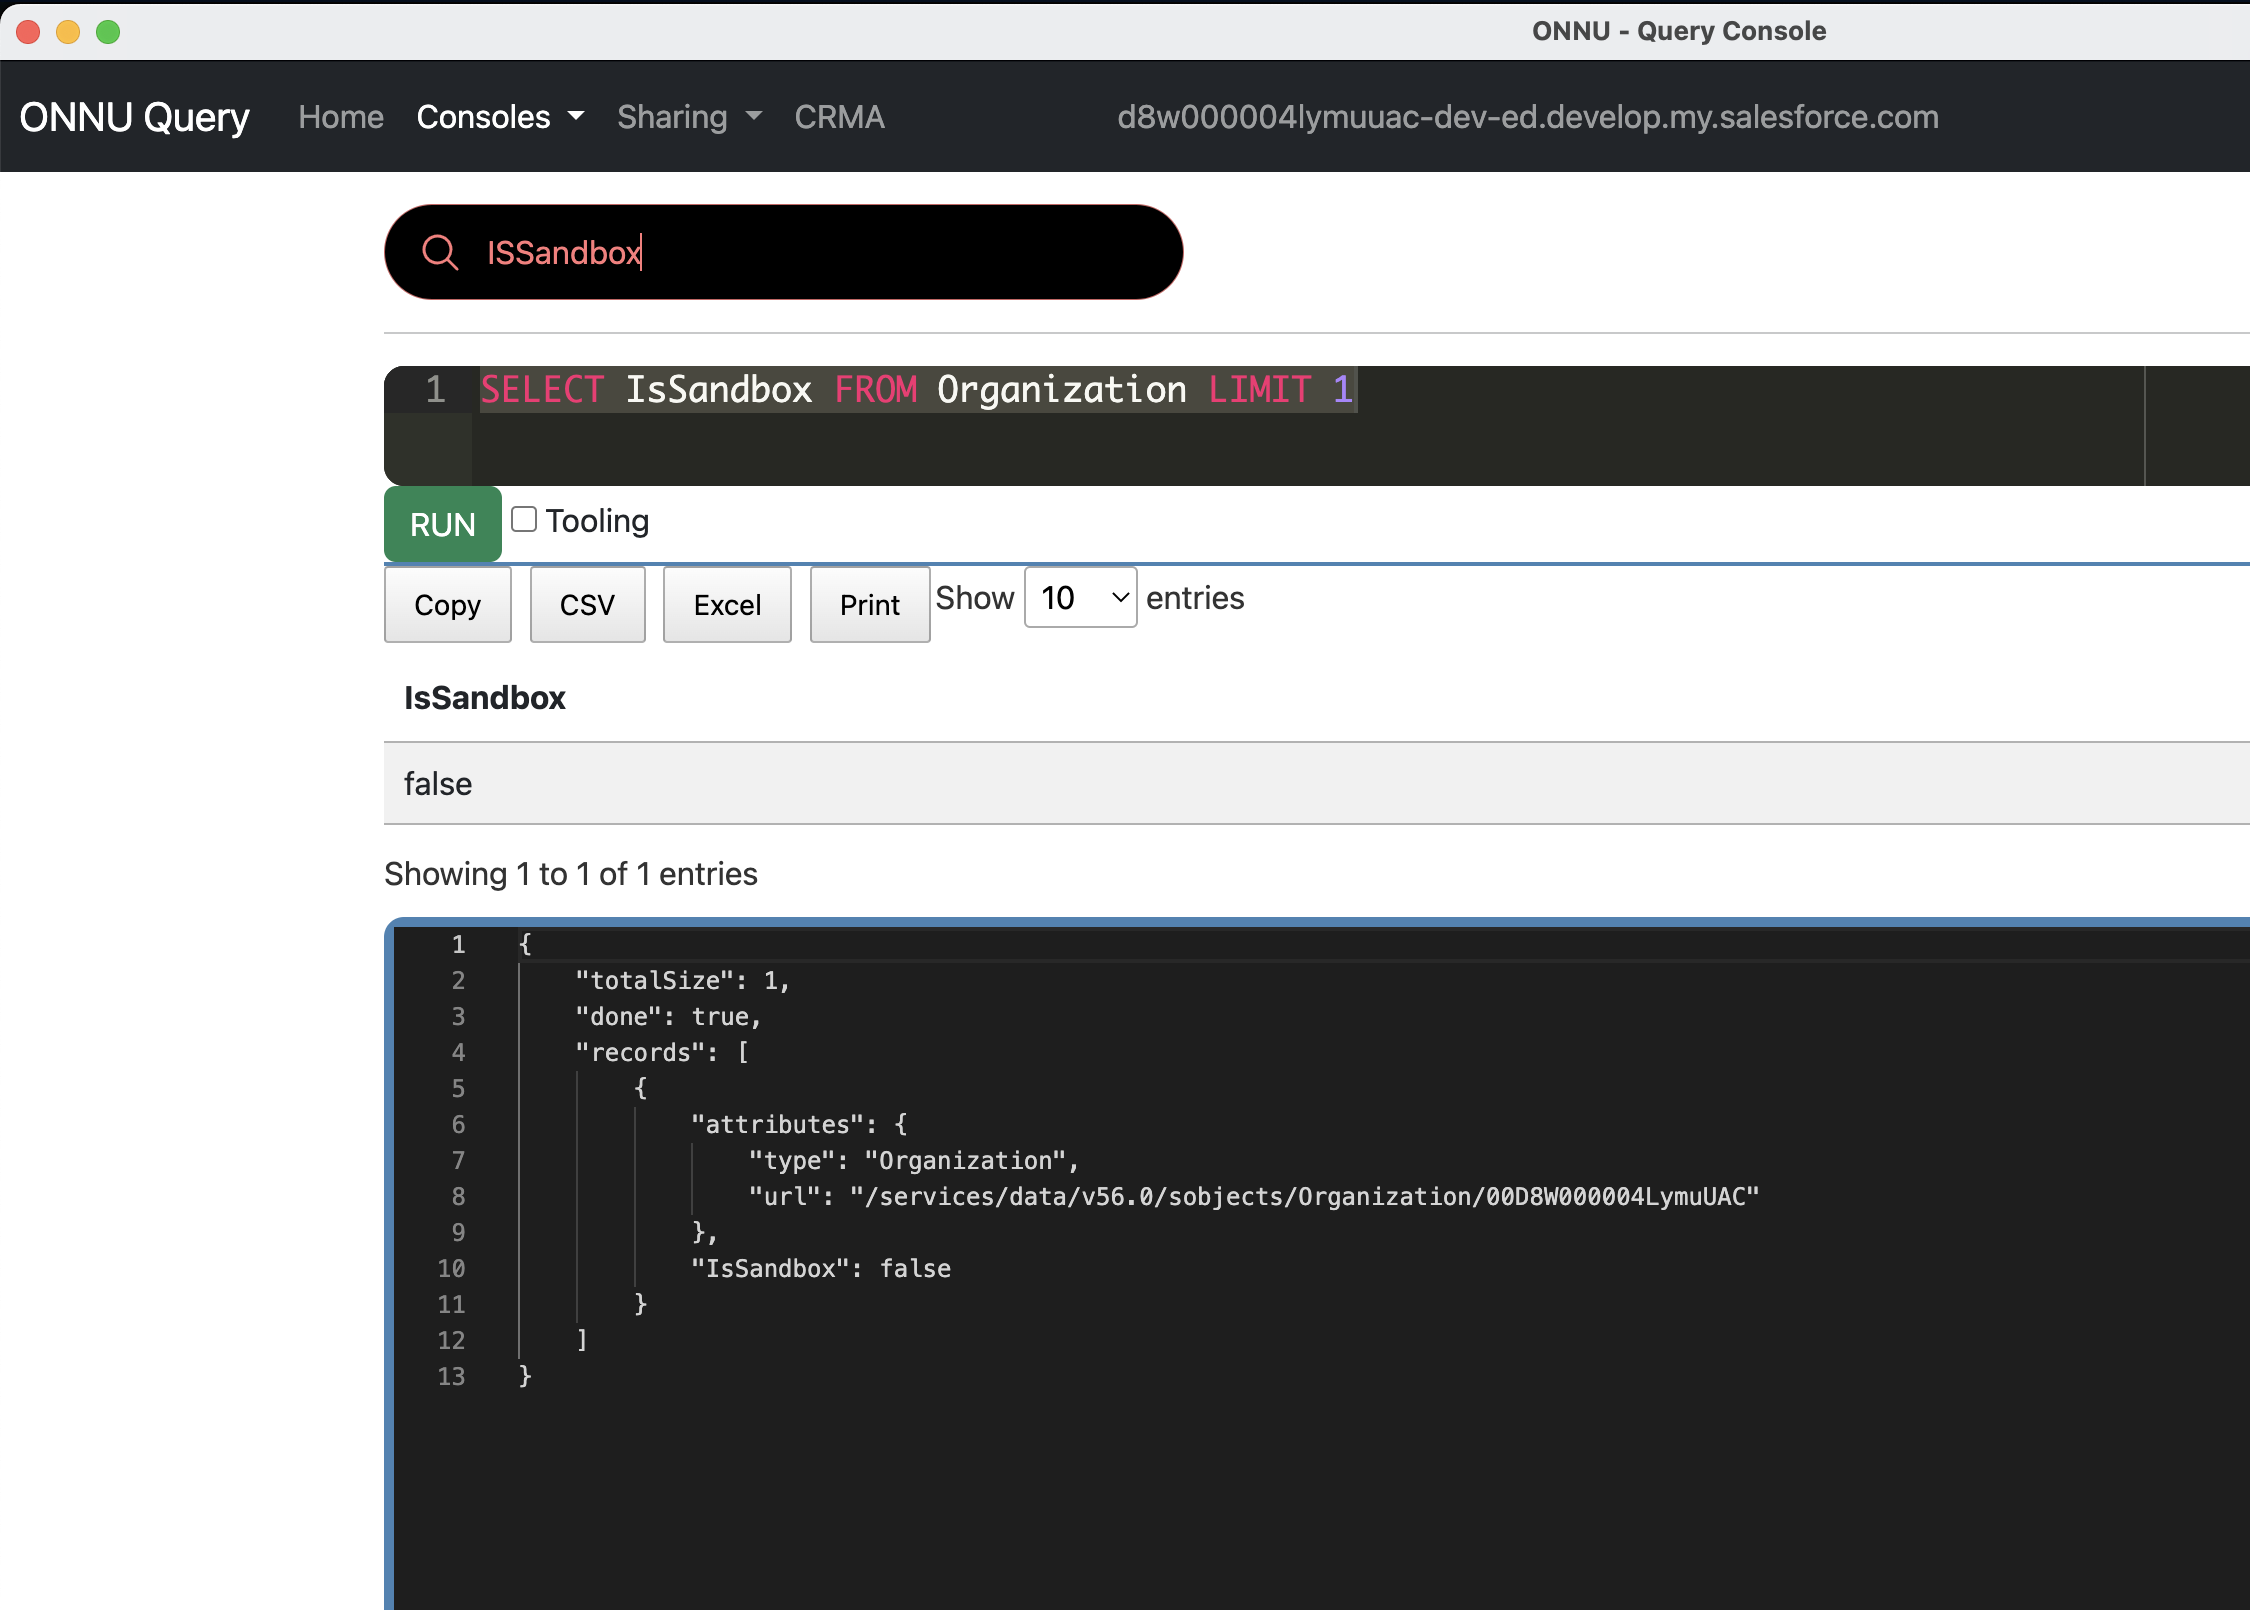
- Apex classes can then use the
- Use custom settings and/or custom metadata types to specify email addresses, integration endpoints, etc.
4. Create a Post-refresh Checklist
- After refreshing a sandbox take care of removing production endpoints
- SandboxPostCopy to extend this interface and add methods to perform post-copy tasks, then specify the class during sandbox creation.
    global class PrepareMySandbox implements SandboxPostCopy {

    global PrepareMySandbox() {
        //Implementations of SandboxPostCopy must have a no-arg constructor.
        //This constructor is used during the sandbox copy process.
        //You can also implement constructors with arguments, but be aware that
        //they won’t be used by the sandbox copy process (unless as part of the
        //no-arg constructor).
        this(some_args);
    }

    global PrepareMySandbox(String some_args) {
        //Logic for constructor.
    }

    global void runApexClass(SandboxContext context) {
        System.debug('Org ID: ' + context.organizationId());
        System.debug('Sandbox ID: ' + context.sandboxId());
        System.debug('Sandbox Name: ' + context.sandboxName());

        // Insert logic here to prepare the sandbox for use.
    }
}
5. Take care of configuration data (not metadata)
- Import it using the Data Loader or Import Wizard.
- Some AppExchange apps use custom object for the configuration. When we create a new sandbox that does not include data, these apps will not work after the sandbox refresh.
- For master-detail relationships - insert the parent records before any child records